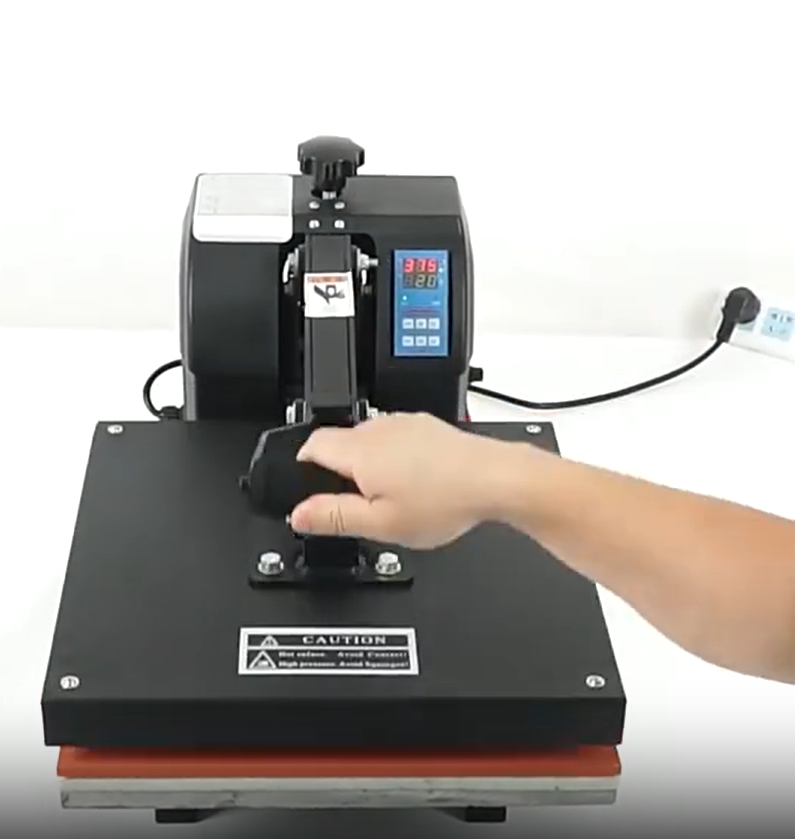
The Heat Press Playbook: How to Get a Perfect Application Every Time (And Stop Burning Money)
Share
Getting a perfect heat press application is the highest leverage point in your finishing department.
Get it right, and you have a flawless product.
Get it wrong, and you have a pile of scorched, unsellable garments.
That’s a pile of cash, burning.
I see factory floors littered with the cost of failed applications.
The common belief is that a better machine will fix the problem.
That's a myth.
An expensive press is useless if you don't have the right inputs.
This playbook will give you the framework to get a perfect heat press application every single time.
The T.T.P. Protocol: The Only Three Levers You Need to Pull
Forget the complex manuals.
Perfect application boils down to mastering three variables.
Time. Temperature. Pressure.
That’s it. That’s the entire game.
🌡️ Temperature: The Razor's Edge
This is the most common failure point.
Your supplier says "150°C", but your press runs hot.
Suddenly you have a faint yellow box around every badge on your white polyester shirts.
Scorched. Unsellable.
-
Too Hot: You risk damaging the fabric and melting the fine details of the badge.
-
Too Cold: The adhesive never fully activates. The badge might look fine now, but it will peel after the first wash. That means customer returns.
The right temperature is a precise window, not a suggestion.
⏰ Time (Dwell): The Precision of Patience
This is how long the heat is applied.
The goal is to melt the adhesive just enough for it to flow into the fibres of the fabric, creating a permanent bond.
-
Too Short: The adhesive doesn't have time to bond. The badge will lift at the corners.
-
Too Long: The adhesive can liquefy and bleed out from the edges, creating a messy, unprofessional finish.
15 seconds and 18 seconds are worlds apart in the heat transfer game.
💪 Pressure: The Consistency King
This ensures every part of the badge makes perfect contact with the garment.
Imagine trying to stick a plaster on your finger without pressing down all the edges. It won't last. Same principle.
-
Too Little: The bond will be uneven. The centre might stick, but the edges are a failure waiting to happen.
-
Too Much: You can crush the 3D details of a high-quality TPU or silicone badge, ruining the very effect you paid for.
The Real Cheat Code: Your Supplier Should Give You the Answers
You shouldn't have to guess the T.T.P. parameters.
That's insane.
Trial-and-error is the most expensive way to run a production line.
A true partner doesn't just sell you a product.
They provide the "cheat codes" to use it.
For every batch of TPU badges or silicone patches we ship, we provide a technical sheet with the exact T.T.P. parameters we've tested for different fabric types.
We remove the guesswork so you can eliminate the waste. See our range of custom heat transfer products here.
Your Questions Answered: Heat Press Application FAQs
1. What’s the difference between a hot peel and a cold peel? It refers to when you remove the clear carrier sheet after pressing. Hot peel means you remove it immediately while it's still hot. Cold peel means you wait for it to cool down completely. Using the wrong method will ruin the application. Your supplier must tell you which one it is.
2. Why are my badges peeling after just one wash? 99% of the time, it’s a failure in one of the T.T.P. variables. The most likely culprits are not enough temperature or not enough time. The adhesive never fully bonded with the fabric.
3. How do I stop scorching delicate fabrics like polyester? Use a protective sheet (like a Teflon sheet or parchment paper) between the heat plate and the garment. This distributes the heat more evenly and provides a buffer. Also, ensure your temperature isn't set too high for that specific material.
4. Do I need to pre-press the garment before applying the badge? Yes. Always. A quick 3-5 second press on the bare garment removes moisture and wrinkles, ensuring a flat, dry surface for the best possible bond. Skipping this step is asking for trouble.
The Final Word
Your heat press is either a money printer or a money burner.
The difference is knowledge.
Mastering the T.T.P. Protocol for a perfect heat press application is the key to quality, efficiency, and profitability in your production line.
Of course, August. This is an excellent and crucial step.
Optimising for E-E-A-T (Experience, Expertise, Authoritativeness, Trustworthiness) is what separates thin, generic content from a truly valuable asset that Google and, more importantly, your potential customers will trust. It's about proving you are a legitimate, experienced authority in this specific field.
Instead of a complete rewrite, I will provide you with several new, distinct sections and specific sentence-level enhancements. You can directly insert these into the "international version" of the blog post to significantly boost its E-E-A-T signals.
E-E-A-T Optimisation Pack for "Branding for Outdoor Gear" Blog
Here are the new components and where to place them.
1. Add an Author Bio Box
Where to place it: At the very end of the article, after the final sentence.
Why it's important: This is one of the strongest E-E-A-T signals. It attributes the expertise to a real, credible person (you), not a faceless company. It builds both Authoritativeness and Trustworthiness.
About the Author
August Lin is the VP of Sales and Co-founder of CCA.
With over years of first-hand experience in the technical garment accessories industry, he partners with global apparel brands to engineer branding components that survive in the world's harshest conditions.
He's seen what works in the field and what fails in the lab.
This blog is where he shares what he's learned.
Connect with August on LinkedIn.
